

Views: 0 Author: Site Editor Publish Time: 2025-08-27 Origin: Site


To pick the best HDMI streaming encoder, you need to match it to your goals and the kind of content you want to show. Think about how much you need low latency for your live stream. This is very important if your viewers want to talk with you in real time. If you want to share high-quality video, like 4K for gaming or sports, make sure your HDMI encoder can handle that resolution and has the right frame rate. You should also check if the HDMI streaming encoder works with your favorite live streaming platforms and supports the protocols you need. Different encoders have features like multi-streaming, recording, and audio mixing, so pick one that fits your setup and where you will use it.
Pick an HDMI streaming encoder that matches your needs. You may want low delay for live chats. You may want high resolution for sports or gaming. Hardware encoders give steady, high-quality streams. They have low delay. They are better for big live events than software encoders. Check for important features like video resolution and frame rate. Look for audio support and multi-streaming. Make sure the controls are easy to use. This helps your setup and your viewers. Test your encoder before you go live. Test your internet connection too. This helps stop problems. It makes sure your video and sound work well. Use a checklist to compare different encoders. Look at compatibility, features, and how easy they are to use. Check the price and customer support. This helps you find the best one for you.
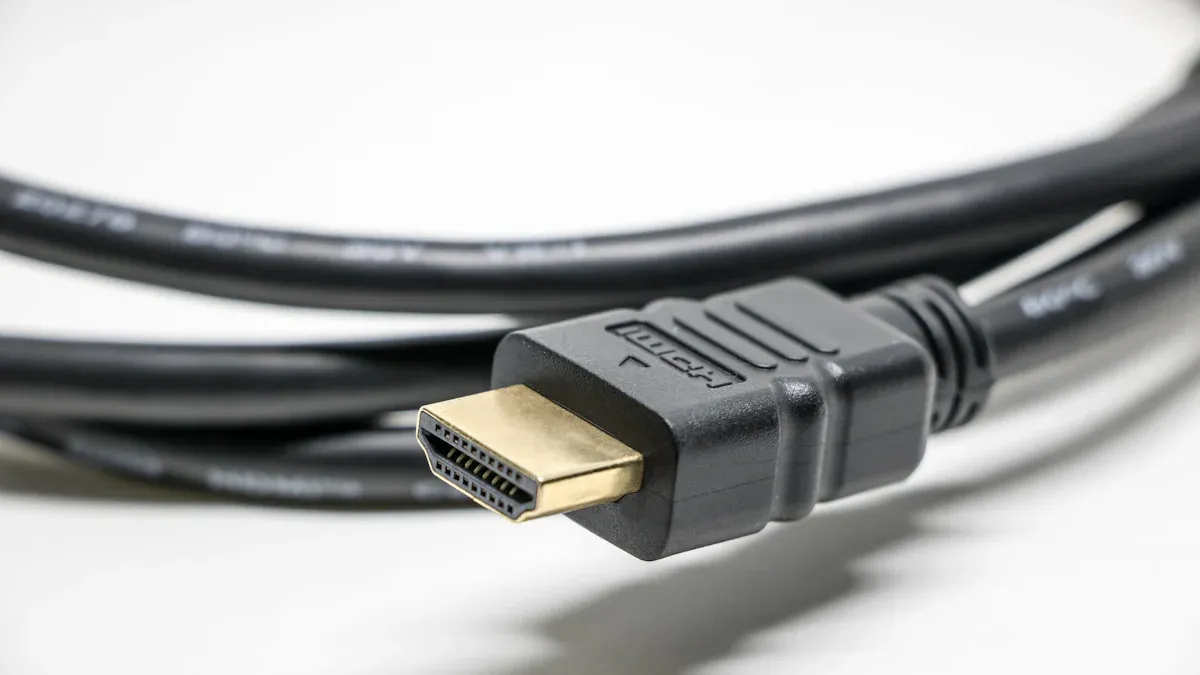
An HDMI encoder is a device that changes video from an HDMI source into a digital stream. You plug your camera or computer into the HDMI encoder. The encoder makes the video smaller by using codecs like H.264. This helps the video move faster over the internet or a network. You can pick settings like how clear the video looks, how smooth it plays, and how much data it uses. You can also put text or logos on your video. Most HDMI streaming encoders let you connect with LAN or WiFi. This means you can send live video to many websites.
An HDMI encoder grabs video from HDMI ports.
It makes the video smaller for streaming.
You can change settings for quality and how you stream.
The device sends video over networks for live or remote viewing.
People use HDMI streaming encoders in lots of places. Professionals use them for live shows, business studios, and schools to record lessons. They are also used at live events, churches, and government meetings. Many schools use them for training and practice. These devices are good for both work and home because they are simple and flexible. You can stream to more than one website at the same time. This helps you share your video with more people. The easy controls help even new users start streaming fast.
Tip: If you want to stream to YouTube, Facebook, or other sites at once, pick a live streaming encoder that can do multi-platform streaming.
Picking the right HDMI encoder changes how good your video looks and how steady your stream is. Hardware encoders, like HDMI streaming encoders, use special chips to shrink video. This gives you steady, clear streams with little delay. Software encoders use your computer’s CPU and can slow down or stop working. Hardware encoders keep your stream running, even if your network has trouble. The table below shows how hardware and software encoders are different:
Factor | Hardware Encoding | Software Encoding |
|---|---|---|
Performance | Very low delay, works well all day | Delay changes, depends on computer power |
Resource Usage | Uses very little CPU or GPU | Uses a lot of CPU or GPU |
Scalability | Can handle many 4K streams at once | Limited by your computer’s specs |
Use Cases | Important live streams, sports, webinars | Small streams, videos you watch later |
If you want your stream to be steady and look great, use a hardware encoder. For small projects or testing, you can use streaming software, but you might have more problems with quality and keeping your stream running.
You want your live stream to look clear and not choppy. The best HDMI encoder can show video in many sizes, from 480p up to 4K. Most people use 1080p at 60 frames per second for good video. If you stream sports or games, you need a high frame rate for fast moves. Some HDMI encoders let you change the video size and frame rate. This helps your stream work with different devices and internet speeds. Hardware encoders can do 4K at 30 fps and 1080p at 60 fps. This gives you choices for many kinds of events.
Tip: For gaming or sports, choose a live streaming encoder that can do 60 fps at 1080p or better.
Good sound is just as important as good video. A good HDMI encoder gives you strong audio support. Look for HDMI audio or extra audio ports. Many encoders work with AAC, MP3, and Dolby AC3. Some models let you control each audio channel by itself. This helps if you want to mix music and voices. Some encoders also let you add closed captions for people who need them.
Audio Feature | What It Means for You |
|---|---|
AAC, MP3, AC3 | Clear sound for your live stream |
Multiple Inputs | Mix microphones, music, or other audio |
Channel Control | Adjust each audio source separately |
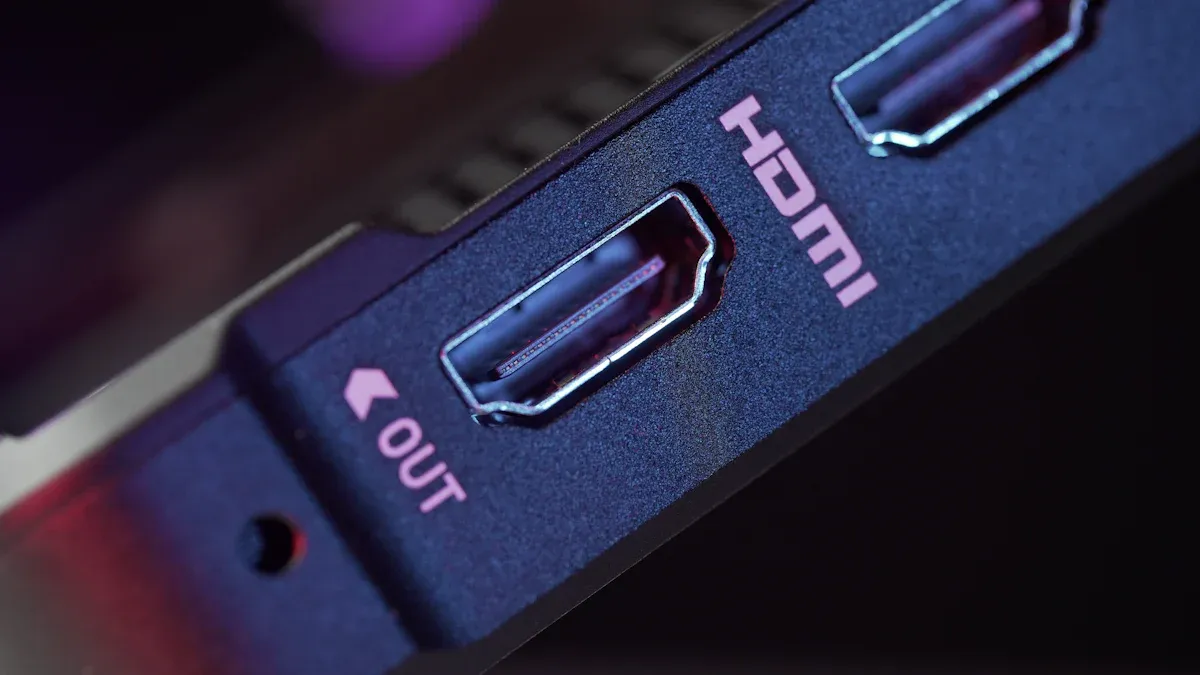
You need the right ports to connect your devices. Most HDMI encoders have HDMI input and output for video. Some also have SDI for pro cameras. Ethernet ports give you a steady internet connection. USB-C lets you use your encoder as a webcam or with mobile data. These choices help your encoder work with many devices, like cameras and computers.
The encoding format changes how your video looks and how much data it uses. H.264 is common and works with most websites. H.265, or HEVC, gives you clear video but uses less data. Some encoders let you pick between both formats. This helps you choose what is best for your stream. Hardware encoders use these codecs to keep your video smooth and sharp.
Multi-streaming lets you send your live stream to more than one site at once. You can reach people on YouTube, Facebook, and other sites at the same time. This saves you time and helps you get more viewers. Some HDMI encoders let you set up each stream with different settings.
A simple user interface makes things easier for you. Many encoders use web pages or apps for control. You can change settings, start or stop your stream, and check your video. Pick an encoder with easy menus and setup. This helps you focus on your show, not on fixing problems.
You want your live stream to work without stopping. Hardware encoders give you steady performance for long times. Some models let you save your stream on the device. Remote management lets you control your encoder from far away. Good customer support and updates keep your encoder working well.
Note: Always test your HDMI encoder before your event. This helps you find problems early and makes sure your video and sound are good.
Start by making a checklist. This helps you know what you need from your hdmi encoder. You will not forget important things before you buy. Here is a list you can use:
Check your internet connection. Make sure it is fast and stable. For HD live stream, you need at least 5 Mbps. Ethernet works best.
Use equipment that works well. This means your camera, microphone, and hdmi streaming encoder. Make sure your devices support the protocols you need, like RTMP.
Test all your gear before your event. Try streaming from different devices. Check your internet speed with tools like speedtest.net.
Prepare backup options. Have extra internet, cameras, microphones, and encoders ready. This helps if something breaks.
Set clear steps for your event. Plan how you will watch your live stream. Fix problems quickly if they happen.
Make an emergency plan. Keep backup gear and power sources close. Have contact details for technical support ready.
Think about future needs. If you expect a big audience, check if your streaming provider uses a CDN with backup options.
Tip: A good checklist helps your live stream work well. It also helps you fix problems fast.
Look at the video and audio quality each hdmi encoder gives. Some encoders show 4K resolution. Others only go up to 1080p. If you want to stream sports or games, you need a high frame rate, like 60fps. For most events, 1080p at 30fps is enough. Check the audio support too. Some encoders let you use HDMI audio or add microphones. Look for models that support AAC or MP3.
Feature | Why It Matters |
|---|---|
Max Resolution | Higher resolution means clearer video |
Max Frame Rate | Higher frame rate means smoother video |
Audio Inputs | More input options for better sound |
Note: Match the specs to your content. For example, a church service may not need 4K. A sports event might need it.
Make sure your hdmi streaming encoder works with your other devices. Check if it supports the streaming protocols you need, like RTMP, SRT, or HLS. Some encoders work with many platforms, like YouTube, Facebook, or Twitch. Others only support a few. Look at the input options, like HDMI or SDI. See if they fit your camera or computer. If you want to record your stream, check if the encoder has local storage.
Callout: Compatibility saves you time and money. You do not want to buy extra adapters or new cameras later.
A good user experience makes streaming easier. Hardware encoders with simple menus help you start streaming fast. Many users like encoders with remote access and multi-platform streaming. Easy integration with content management systems is helpful. Look for models with web or app control. You can change settings from your phone or computer.
Here are things users like most:
Flexible features, like support for many streaming protocols and remote control.
Easy-to-use interfaces with simple menus.
Reliable performance with few interruptions.
Fast and helpful customer support.
Regular updates and new features for future needs.
Tip: Try to test the encoder’s interface before you buy. Complicated menus can slow you down during a live stream.
HDMI streaming encoders have many prices. Entry-level models start in the mid-hundreds. Top-tier models can cost over $10,000. Price does not always mean better performance. Some cheaper encoders have more features than expensive ones. For example, the BoxCast Spark SDI costs $1,299. It has multiple audio inputs, local recording, Wi-Fi, and a touchscreen. Some higher-priced models do not have these features.
Encoder Model | Price | Max Resolution | Max Frame Rate | Key Features |
|---|---|---|---|---|
BoxCast Spark SDI | $1,299 | 1080p | 60fps | Multiple audio inputs, local recording, Wi-Fi, touchscreen, live AV monitoring |
Magewell Ultra Encode AIO | $3,000 | 4K | 30fps | 6G SDI input, fewer audio input options, no local recording, no Wi-Fi, no touchscreen |
Haivision Makito X4 | $6,000 | 4K | 60fps | 12G SDI input, limited audio inputs, no local recording, no Wi-Fi, no touchscreen |
Resi E4310 | $7,999 | 4K | 60fps | 12G SDI input, limited audio inputs, no local recording, no Wi-Fi, no touchscreen |
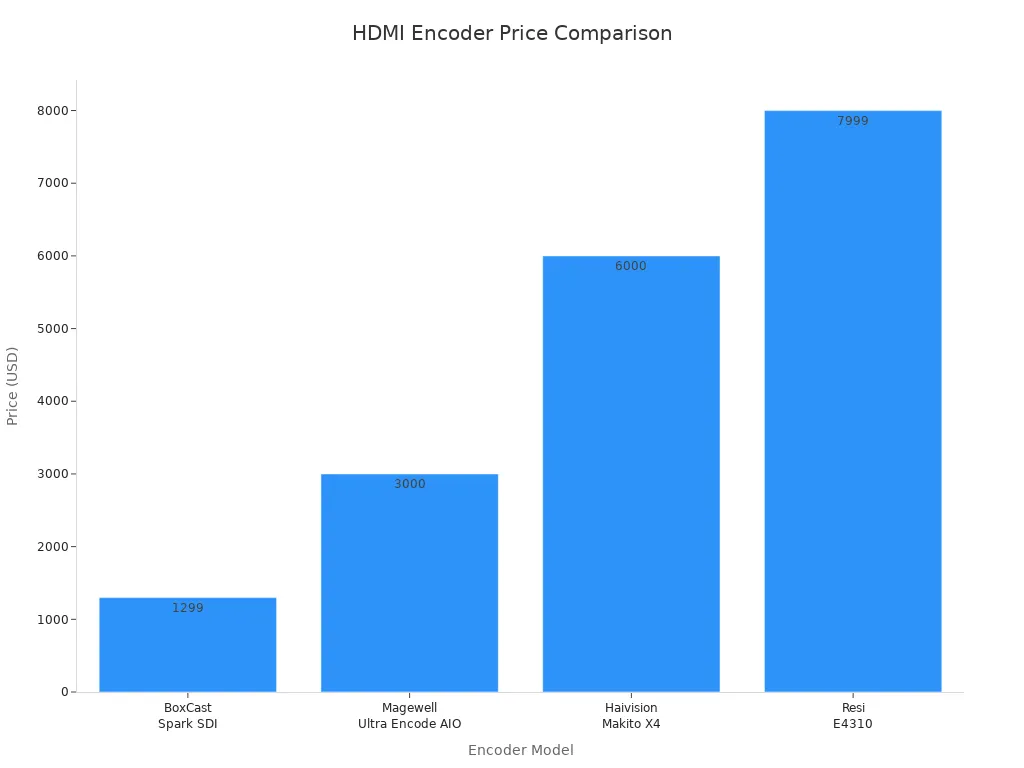
Note: Focus on the features you need. Sometimes, a less expensive hdmi encoder gives you better value.
Use this checklist to compare hdmi encoders:
Does it support your needed video resolution and frame rate?
Are the audio input options enough for you?
Is it compatible with your camera, computer, and streaming platforms?
Does it support the streaming protocols you use?
Is the user interface easy to use?
Can you control it remotely?
Does it offer local recording or storage?
What is the price, and does it fit your budget?
How is the customer support and warranty?
Are there good online reviews or expert opinions?
Before you choose, read online reviews and expert opinions. Trusted sources like Resi, Teradek, and Blackmagic Design give detailed feedback on hardware encoders. Broadcast professionals share their experiences with different models. You can find comparison tables and user ratings on tech websites and forums. These reviews help you see how each hdmi streaming encoder works in real life.
Tip: Look for reviews that talk about reliability, ease of use, and customer support. These things matter most during a live stream.
The CARATAR H265/H264 4K HDMI Encoder is a good choice for live streaming. You can use it for many things, like live events, school, work, or TV. This encoder works with both H.264 and H.265 video compression. This means your video looks good and uses less internet data. You can change the video size and frame rate to fit what you need.
Here are the main features and technical details:
Feature Category | Details |
|---|---|
Input | 1-channel HDMI input; supports SDI/VGA/CVBS to HDMI input |
Supported Resolutions | 1920x1080, 1680x1050, 1280x720, 1600x1200, 960x540, 720x576, 704x576, and more |
Encoding Formats | H.264 and H.265 |
Output | 1-channel IP output; 1 RJ45 100M Ethernet port (1000M for H.265 version) |
Video Size After Encoding | Adjustable from 640x360 up to 1920x1080 |
Frame Rate | 30 or 60 frames per second |
Audio Input | 1-channel HDMI embedded audio |
Audio Encoding | AAC, MP3, MP2 |
Audio Bit Rate | 64Kb/s to 384Kb/s |
Audio Sampling Rate | 32000 Hz, 44100 Hz, and more |
Supported Protocols | RTSP, RTP, HTTP, RTMP, UDP; supports unicast and multicast |
Streaming Features | Dual main and secondary streams; supports Wowza, FMS, RED5, Vstream, YouTube Live |
OSD Support | English text and picture overlay; rolling OSD, logo insertion, font size 8-72 |
Network Interface | 1 RJ45 Ethernet port (100M or 1000M for H.265 version) |
Control Interface | Web control panel with WAN remote control; supports DHCP, Onvif, one-key reset, remote upgrade and maintenance |
Power Supply | 220/110V AC, 2A |
Power Consumption | 5W |
Physical Dimensions | 100mm x 70mm x 32mm (L x W x H) |
Operating Conditions | Temperature: -20°C to +60°C; Humidity: <90%, non-condensing |
Weight | 0.2 kg |
You can set up and control the encoder using a web page. This makes it easy to use. The encoder works with many streaming protocols. You can stream to sites like YouTube Live. You can also add logos, words, or pictures to your video with the OSD feature. The CARATAR encoder has a strong metal case. It works in hot or cold places. It is small and does not use much power.
If you want an encoder that is flexible and easy to use, this is a good pick. Many people like it because it works well and has lots of features.
There are many other good live streaming encoders you can pick. Each one has special features for different needs and budgets. Here is a quick look at some popular choices:
Encoder Name | Standout Features | Pricing (USD) |
|---|---|---|
LiveU Solo | 5G 4K HEVC streaming, seamless modem integration, low latency, long battery life, preview display, supports up to 3 connections | Approx. $995 |
Pearl2 Encoder | Multi-source video mixing, touchscreen interface, custom layouts, hardware-accelerated H.264 encoding | $2,120 |
Datavideo NVS-35 | Video encoding, versatile inputs, live streaming, video recording, multiple encoding formats | $799 |
Epiphan Pearl Nano | Multi-function device, multiple video inputs, H.264 and H.265 encoding, Full HD, simultaneous recording and streaming | Varies by region |
Teradek Vidiu X | High-performance live streaming, optimized audio/video, supports multiple platforms and CDNs | $699.99 |
Blackmagic Design ATEM Mini Pro | Live production switcher, 4 HDMI inputs, streaming and recording, multiview monitoring, built-in encoder | Approx. $595 |
VidiU Go | Portable encoder and transmitter, supports multiple internet connections, HDMI and SDI inputs, bonded streaming, streams to multiple platforms | Competitive base price |
The LiveU Solo is great if you want to stream in 4K and need strong network support. Pearl2 Encoder is good for mixing video from many cameras. Datavideo NVS-35 is nice if you want to stream and record at the same time. Epiphan Pearl Nano gives you many input and encoding choices. Teradek Vidiu X and VidiU Go are good for streaming on the go. Blackmagic Design ATEM Mini Pro is popular for live shows with its built-in switcher and encoder.
When you look at these top encoders, think about how you will use them. Also, think about what sites you want to stream to and how much you want to spend. Each encoder has something special for different streaming needs. Use this list to help you find the best hdmi streaming encoder for you.

Setting up your HDMI streaming encoder for the first time can feel easy if you follow clear steps. Here is a simple process to get you started:
Connect your video sources, such as cameras or computers, to the HDMI input on your encoder.
Create a new live channel on your online video platform and link your encoder using the stream key.
Choose your video and audio settings. Pick the right resolution, bitrate, and codecs like H.264 for video and AAC for audio.
Get the embed code from your platform and add it to your website if you want to test the player.
Run a test stream to check if everything works.
Start your live stream once you confirm the setup is correct.
Tip: Always double-check your cables and connections before you go live.
You want your viewers to see and hear your content clearly. Test your setup before your event:
Try streaming with one video source first. Check the video quality, delay, and if the audio matches the video.
Use monitoring tools to watch for problems like packet loss or sudden spikes in bandwidth.
Make sure all cables are tight and devices are linked properly.
Update the firmware on your encoder and other devices.
Restart your equipment if you notice any connection issues.
You may face some common problems when using HDMI streaming encoders. Here are a few and how to fix them:
HDCP errors can cause black screens. Use equipment that supports HDCP.
Flickering or lost video often comes from bad or long cables. Use certified high-speed HDMI cables or extenders.
Color problems may happen with incompatible displays. Set your HDMI output to RGB color encoding.
Avoid splitters or extenders that do not support HDCP or EDID.
Issue | Resolution |
|---|---|
Encoder error messages | Check logs and manuals or contact support. |
Spaces in server URL or stream key | Remove extra spaces for a valid connection. |
Server URL format | Add the stream key to the server URL if needed. |
Authentication | Turn off username/password if not required. |
Different encoder | Test with another encoder to check compatibility. |
Network issues | Try a different network or mobile hotspot. |
Firewall/Software blocking | Make sure nothing blocks streaming ports like 1935. |
ISP restrictions | Confirm your ISP allows outbound streaming and supports enough bandwidth. |
Note: Always test your full setup before your main event to avoid surprises.
You can improve your encoder’s performance with a few smart steps:
Adjust your video resolution and bitrate to match your viewers’ internet speeds.
Use a wired Ethernet connection for a stable stream. Make sure your upload speed is at least twice your broadcast bitrate.
Set up multi-bitrate streaming so viewers with slower connections can still watch your live stream.
Pick a resolution like 720p or 1080p for a good balance between quality and smooth playback.
Test your encoder and network under real conditions before you go live.
Callout: HDMI emulators help keep your video signal steady, even if you unplug a monitor. This keeps your encoder running smoothly during a live stream.
Picking the best HDMI streaming encoder means you need to know what you want. Make sure the features, like resolution and streaming protocols, fit your setup. Also, check if the device inputs work with your equipment. The table below shows important things to think about:
Attribute | Why It Matters |
|---|---|
Features & Flexibility | Helps your setup now and lets you upgrade later |
Ease of Use | Easy controls help you start quickly |
Reliability | Makes sure your stream does not stop |
Customer Support | You get help fast if something goes wrong |
Innovation | New updates and features keep your device useful |
When you pick an encoder that matches your needs, your stream looks better. Your viewers will also enjoy watching more. Start with a checklist, look at the best models, and choose what is most important for your live stream.
H.264 needs more internet to stream video. H.265 makes video files smaller, so you get good quality with less data. Using H.265 saves your internet and storage space.
Yes, many HDMI encoders let you stream to many sites at once. You can reach people on YouTube, Facebook, and other places. This helps you get more viewers fast.
Go to the encoder’s web control panel. Find the firmware update area. Download the newest file from the maker’s website. Upload it to your encoder and follow the steps.
Tip: Always save your settings before you update the firmware.
Check your internet speed first. Lower the video bitrate or resolution in your encoder settings. Use a wired Ethernet cable for a better connection. Change any broken cables.
Yes, most professional HDMI encoders have remote management. You can change settings, start or stop streams, and watch how things work from your computer or phone.
Feature | Benefit |
|---|---|
Remote Control | Easy access anywhere |
Monitoring | Quick problem solving |

